Initial Setup (Dicker Data)
![]() Updated
by Support
Updated
by Support
Initial Setup - Quick Summary
Prerequisites
- Microsoft Account on your Office 365 tenancy. This account must have:
- Global Administrator permissions OR At least Admin Agent permissions
- 2 Factor Authentication enabled
- Dicker Data API Token provided by the Dicker Data team
- ConnectWise API Member or Autotask API User
- Verify your MPN ID from the Microsoft Partner Center
- Google Chrome or Firefox browser to complete the initial setup process
Steps
(Covered in more detail in the next section below)
- Browse to app.cspportal.cloud with Google Chrome or Firefox
- Login with Microsoft OAuth for your MSP Tenancy
- Enter your Dicker Data Account Code, Access Code and MPN ID
- Authorise CSP Portal to your customer tenancies via Partner Center
- Enter your PSA API Keys
- Enable Allowed Users
Initial Setup - Step by Step
Once you have the prerequisites listed above:
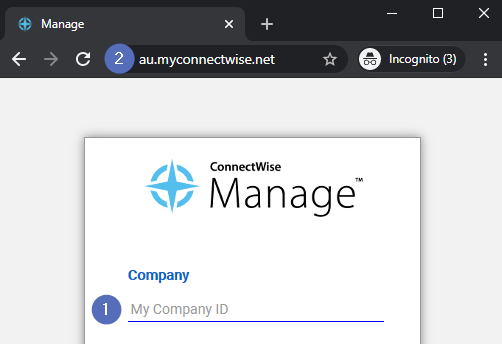
Browse to app.cspportal.cloud and sign in using your Office 365 account. This doesn't necessarily need to be your Global Admin, as we will use this account later to authenticate with the Partner Center.
This must be an account associated with your MSP Tenancy (Not a client or end-user account).
Please note this account should not have a .onmicrosoft.com domain.
- CSP Portal uses Microsoft’s OAuth v2.0 identity system for authentication. This is used to gather end user and licensing details, as well as logging & auditing.
- If available, enable Consent on behalf of your organization.

- Review and accept the Permissions requested page

Complete the basic Wizard information
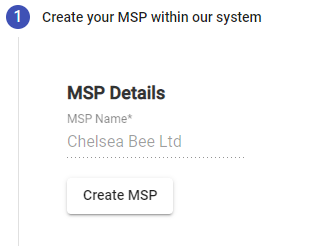
Your MSP Details will be filled for you from your Microsoft Tenancy
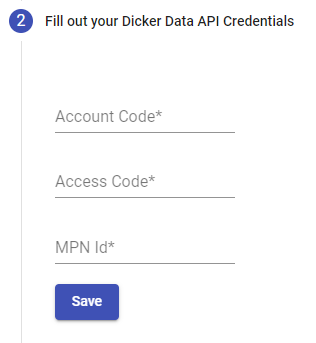
Account Code:
- This is the Account Number used to login to:
- portal.dickerdata.co.nz for New Zealand partners.
- portal.dickerdata.com.au for Australian partners.
Access Code:
IMPORTANT: This is provided by Dicker Data. Please approach your Account Manager for more information.
To receive your Dicker Data Access Code, API access must be granted firstly by Dicker Data's integration support team. You can request this using the below steps:
- Email integration.support@dickerdata.com.au, requesting access from Dicker Data's integration support team.
- Make sure to include the following information in your request:
- Company name
- Account number
- Technical contact name
Dicker Data’s support team will provide the Access Code once API access is granted.
MPN ID:
This is your companies Microsoft Partner Network ID and is assigned to you when you become a Microsoft Partner.
- This can be found at the Microsoft Partner Center
Setup Application Access
CSP Portal requires access to the details of your clients in order discover and display the assigned users of licenses & verify license counts between the Dicker Data and Microsoft platforms. Without this we are unable to retrieve the subscription details for your clients and thus will be unable to properly sync licensing information from Dicker Data to your PSA.
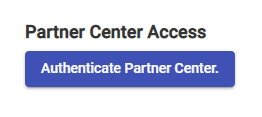
We have found that authenticating through the Partner Center is the most reliable way to do this.
- Select Authenticate Partner Center, if this is unsuccessful please review the following:
If this step fails, review the following article: Confirm your Microsoft Account has the correct permissions
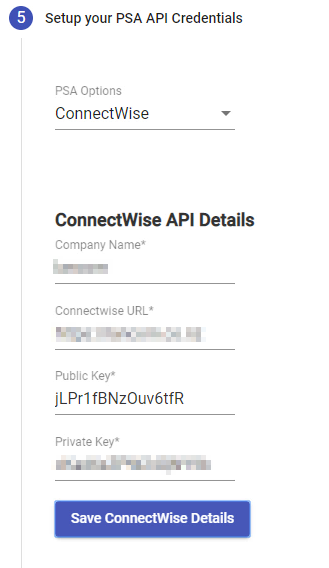
Select your PSA, and enter API details
(For Connectwise)
Company Name
- My Company ID within Connectwise
Connectwise URL:
- Service URL that you log into your Connectwise from
Public Key + Private Key:
- Log in to the Connectwise client as an admin user
- Go to System => Members => API Members
- Create a new member for the CSP Portal and fill out all mandatory fields
- Save the member
- Go to the header API Keys
- Create a new API Key with a name related to the CSP Portal
- Save the key and copy paste the public and private keys into the fields on the portal
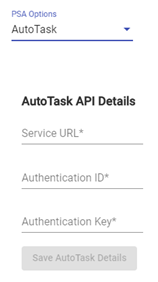
(For Autotask)
Service URL:
URL Used to login to the Autotask client
Authentication ID + Key:
The ID is the Login Username of an API User and the Key is the Login Password of an API User
How to create an Autotask API User for the CSP Portal
- Enter the login username into the Authentication ID Field
- Enter the login password into the Authentication Key Field
Allow Additional Access to your CSP Portal
A list of users will be pre-generated from your Office 365 tenant.
Click and drag names from the Disallowed Users column to the Allowed Users column as required.
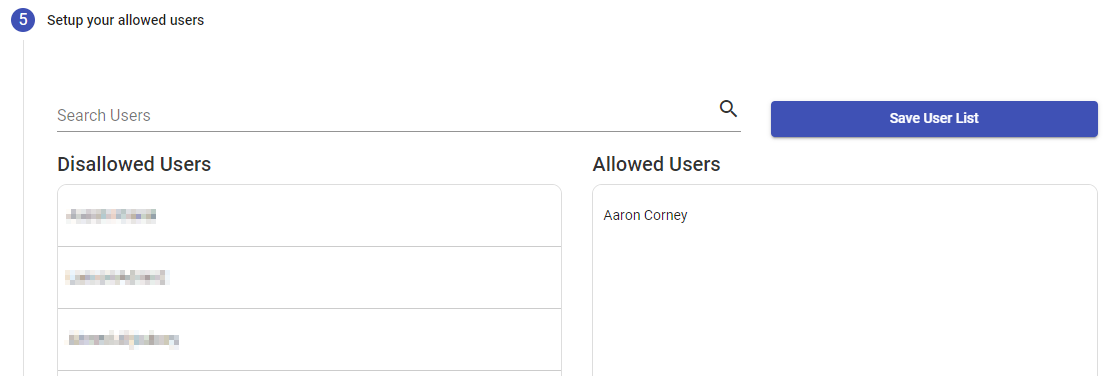
These can be altered later from your Company Settings page.
Select Save User List to finalize your setup.