Azure Invoices in CSP Portal
![]() Updated
by Support
Updated
by Support
This article covers the process for syncing your first Azure invoice within CSP Portal.
Azure Quick Start Video
CSP Portal detects and parses your monthly Azure invoice from Dicker Data. This includes usage for:
- Azure Consumption
- Azure Reserved Instances
Supporting information and considerations for your PSA are covered in the following articles:
Azure Billing Workflow
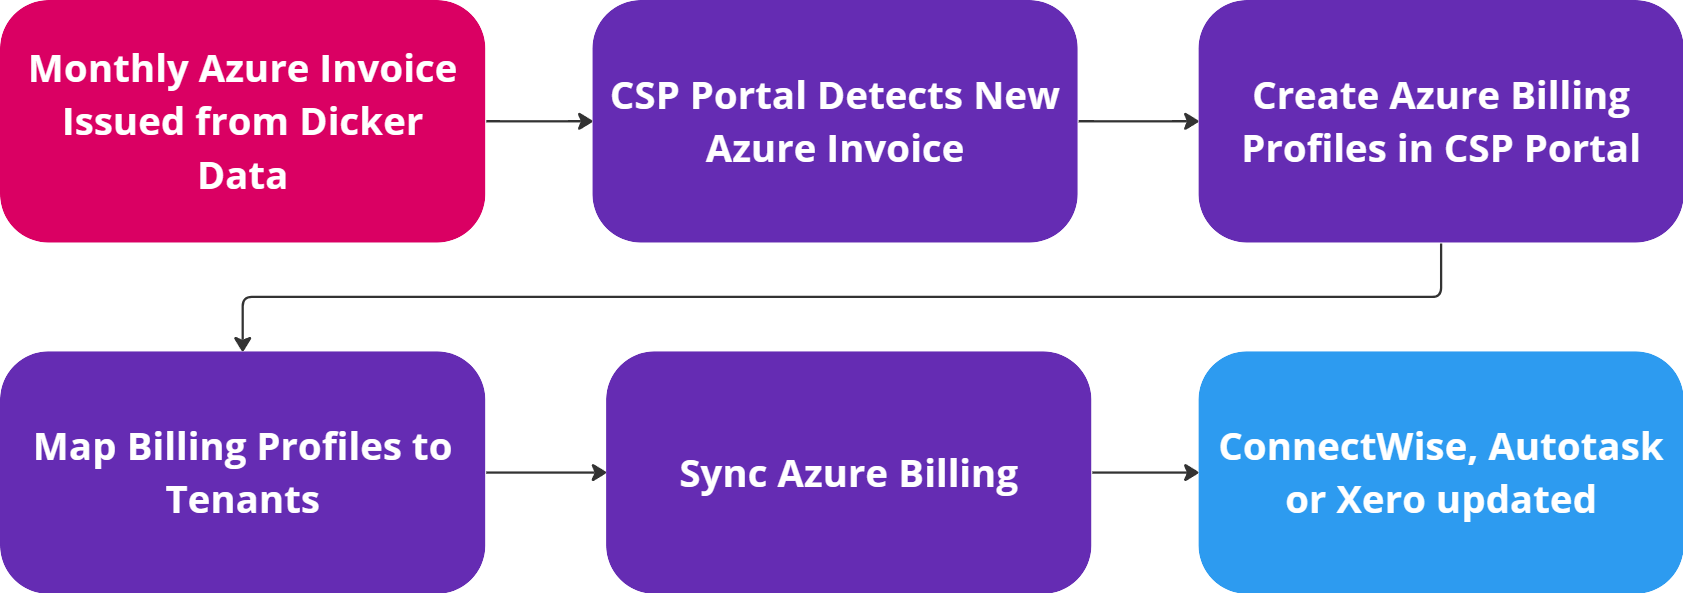
Monthly Azure Invoice issued by Dicker Data
- Dicker Data start processing NCE related billing once finalisation is received from Microsoft
- Although the timing of these invoices are subject to Microsoft, Dicker Data aim to have these complete by mid-month
- As a Dicker Data partner, you will receive a single invoice containing all Azure related charges for the previous month
- Once this invoice is received, CSP Portal automatically detects that a new Azure invoice is ready to be processed
- Your Azure invoice will appear in the Azure Menu
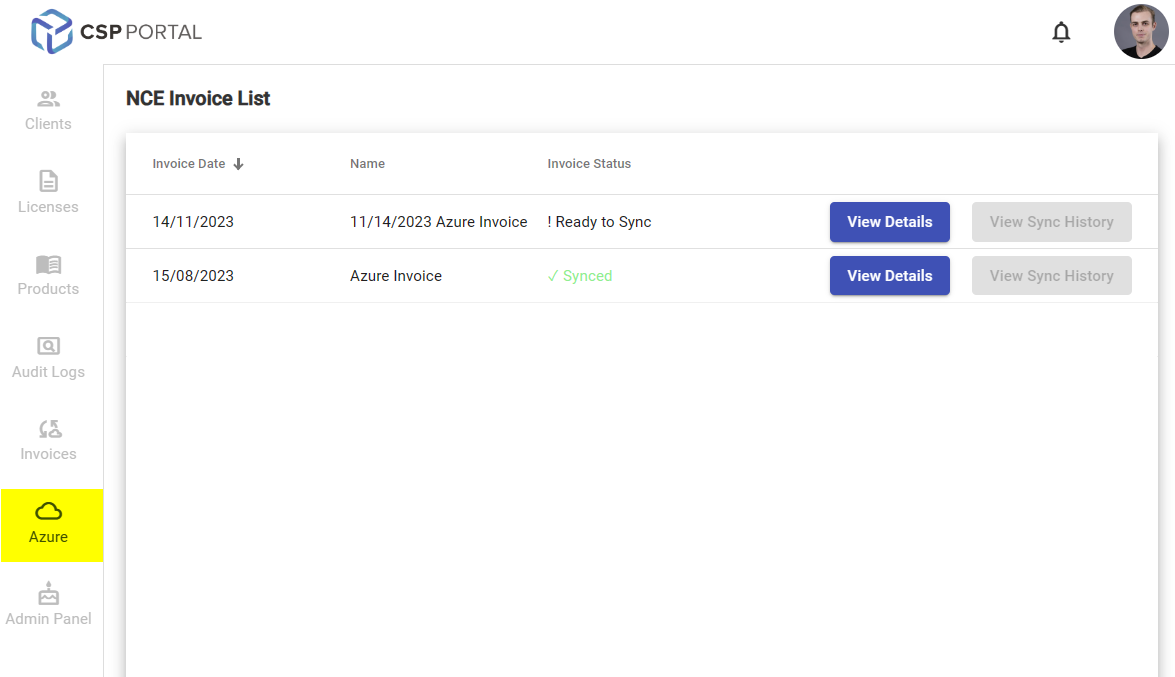
Azure Menu
This module displays Azure invoices detected by CSP Portal from your Dicker Data account.
- Ready to Sync: An invoice has been detected, and has not been processed by CSP Portal
- Syncing: An invoice is currently being processed by CSP Portal
- Synced: This invoice has been processed by CSP Portal
Select View Details to continue
Invoice Details

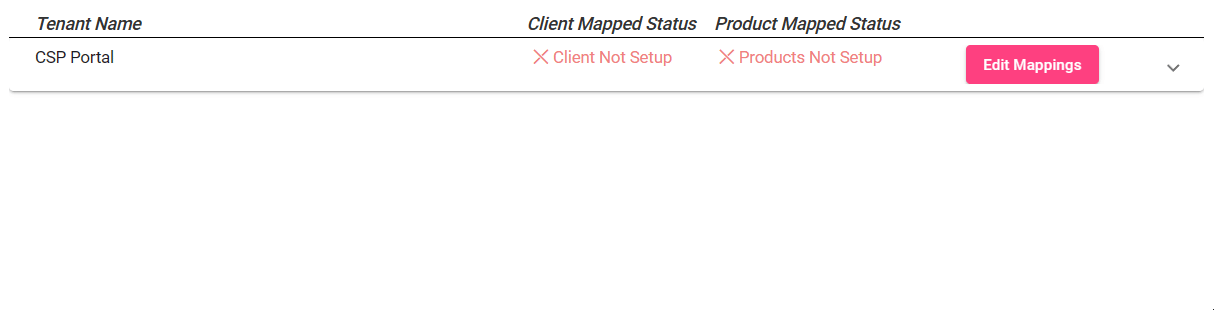
Select a tenant to preview their invoice and mapping information:
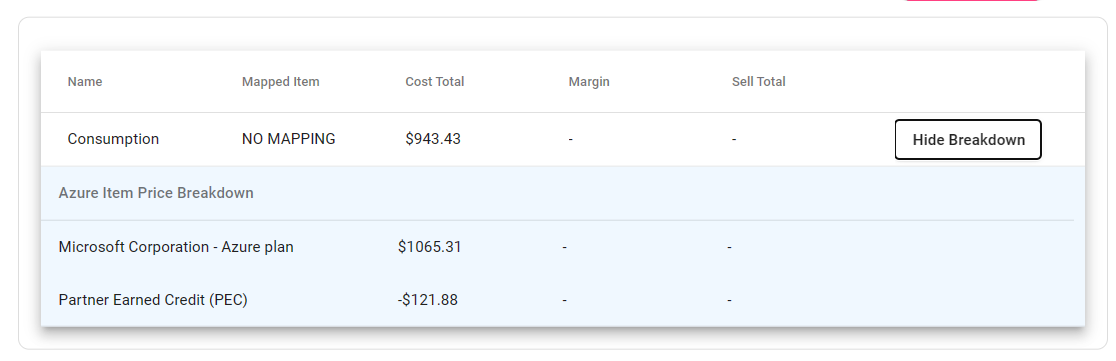
With a tenant expanded, select Show Breakdown to see additional supporting information related to the line item:
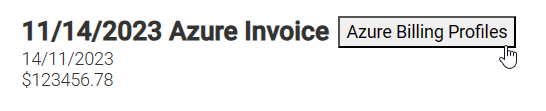
Azure Billing Profiles
Azure Billing Profiles create the relationship between a Dicker Data Stock Item and a ConnectWise Product or Autotask Service. For Xero customers, an Item Name is provided to populate on the customer's draft invoice.
These profiles can be adjusted from the Azure Billing Profiles menu:
Create Azure Billing Profiles
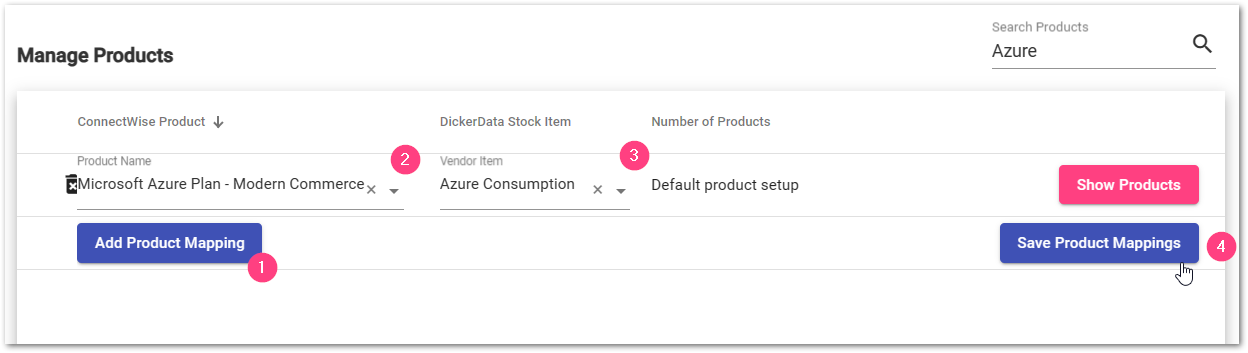
Within the Azure Billing Profiles menu:
- Select Add Product Mapping
- Search and select a product or service from the Product Name dropdown
- Select the relevant Dicker Data Stock Item from the Vendor Item dropdown
- Select Save Product Mappings
Updating or Adding Percentage Off RRP on Product Profiles
When a Product Profile is created, it is set with a Percentage Off RRP value as 0%. This is used during the sync to calculate the sell value of your customer's Azure items:
- Zero sets the sell total to that of RRP
- A positive number increases the sell total above RRP
- A negative number decreases the sell total below RRP
Select Show Products within the Azure Billing Profile window to view this configuration:
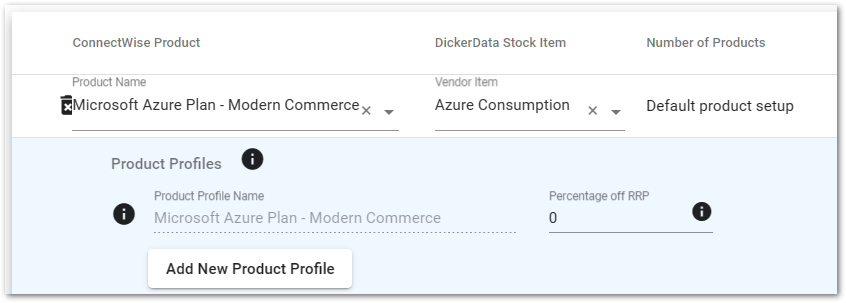
The default Percentage Off RRP can be adjusted as required, as well as the ability to add new product profiles to be assigned on a per-tenant basis:
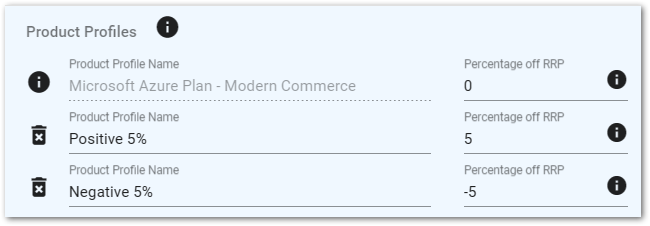
After making adjustments, select Save Product Mappings to finalise your changes.
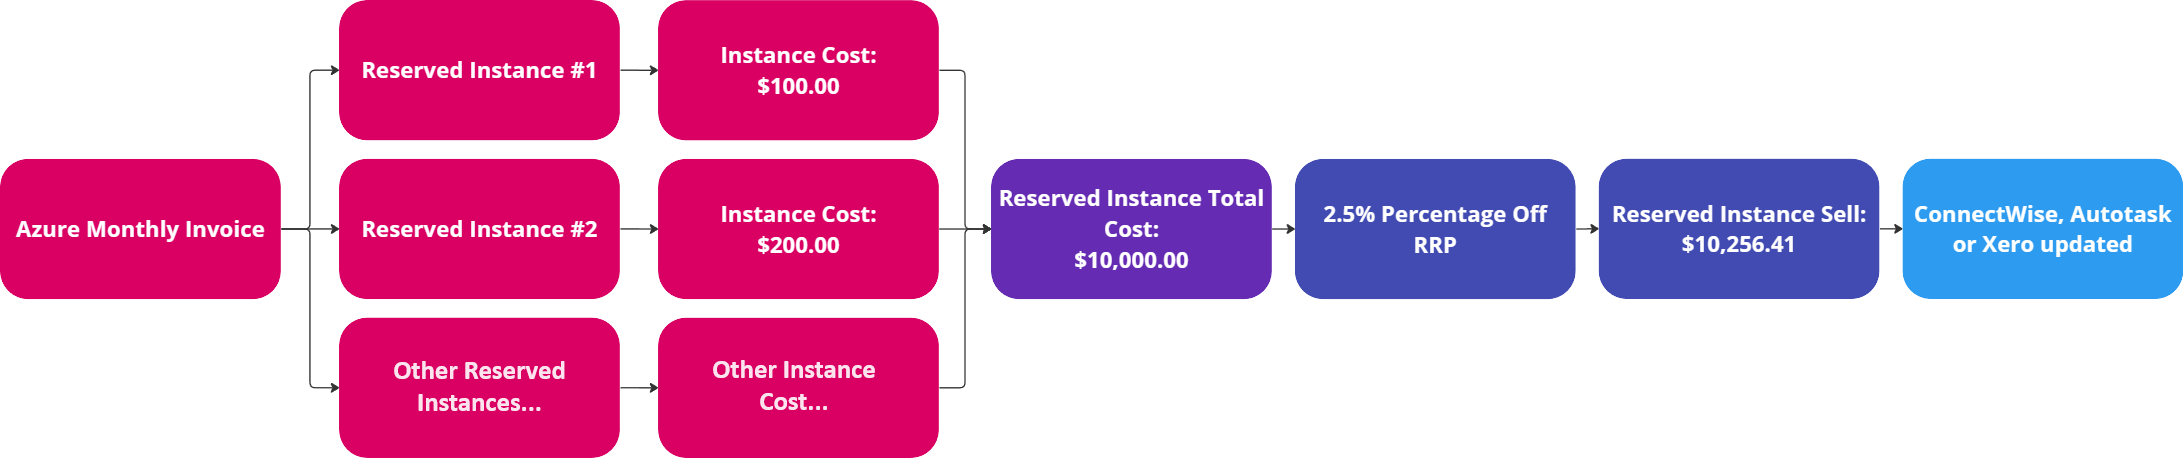
As an example, if we apply a Percentage Off RRP value of 2.5% to a tenant, we will expect the sell total to increase, and our updated workflow for Reserved Instances is now:

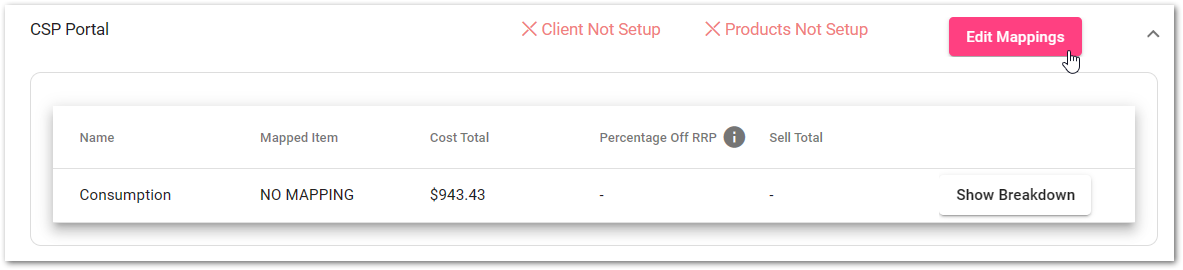
Resolving Missing Mappings
Select Edit Mappings for a tenant to resolve the Client Mapped Status and/or Product Mapped Status:
To resolve the Client Mapped Status, search and select a Company from ConnectWise, Company from Autotask or Contact from Xero. Once selected, select Save.
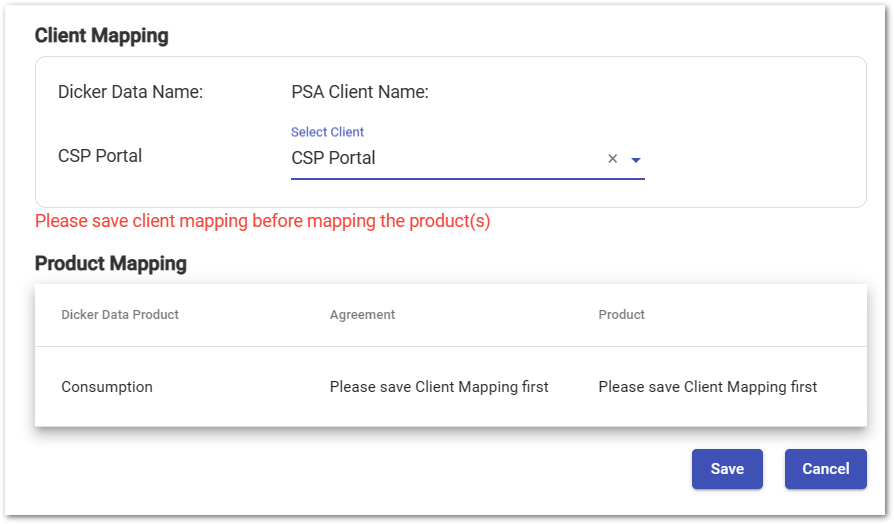
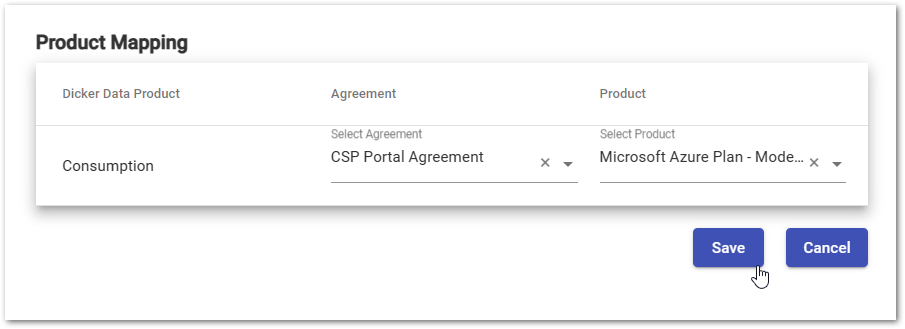
To resolve the Product Mapped Status, for each entry under the Product Mapping heading search and select:
- An Agreement for ConnectWise or Contract for Autotask
- An Azure Billing Profile
Select Save to finalise this process:
Sync an Invoice to your PSA
Once all Azure mappings are resolved, select Sync Now to complete this process.

More information on the sync logic and examples for each PSA are available on separate articles: